This blog post helps you in installing “ZoiPer IAX SIP VOIP Soft-phone” on Android and also configure it to work with your DoorVaani account. Please refer to the screen shots and follow the annotations made on those screen shots. If you don’t have a DoorVaani account yet, please register for free here.
- Go to Google Play Store on your Android device and search for “ZoiPer”. Select “ZoiPer IAX SIP VOIP Softphone ” from the search results.
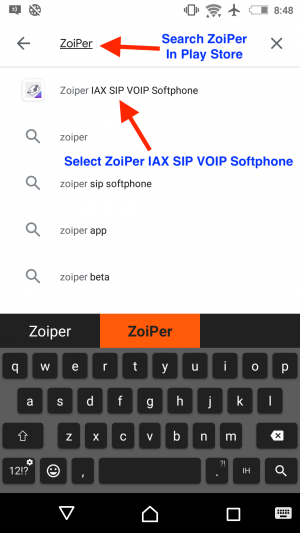
Google Play Store Search for ZoiPer
- Ensure that the app publisher is “Securax LTD” and then tap on the Install button.
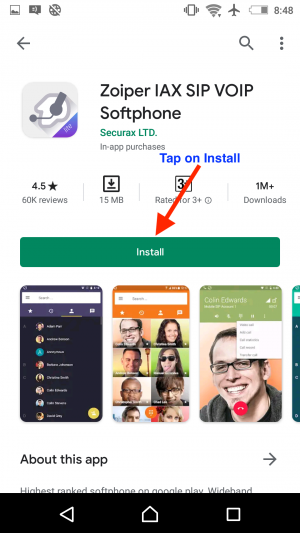
Google Play Store Zoiper App
- Tap on the open button after the app installation is completed.
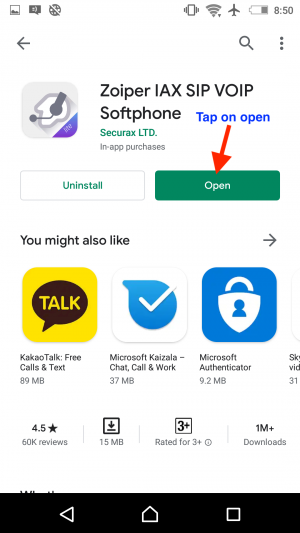
Google Play Store After ZoiPer Install
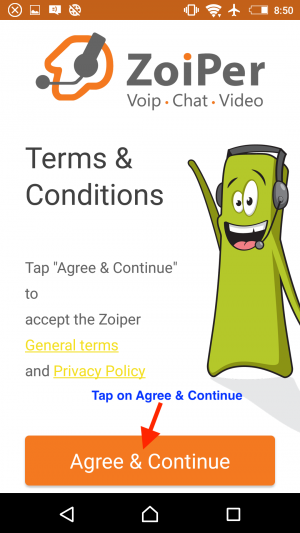
- On the Terms and Conditions screen, tap on “Agree & Continue”.
Agree Terms
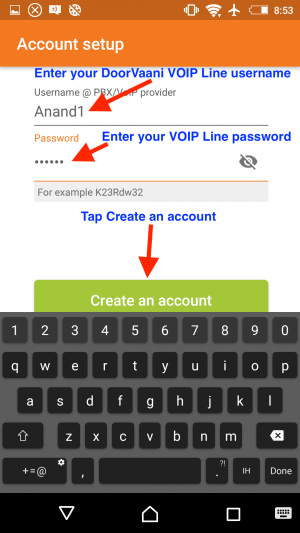
- On the “Account setup” screen, enter your “DoorVaani VOIP Line username and password”. Please note that both VOIP Line username and password are case sensitive. If you have not yet created a VOIP Line in your account, please create it now. Click here for how to create VOIP Line. If you forgot your VOIP Line password, you can reset it in your DoorVaani.com account. Click here for how to reset VOIP Line password.
VOIP Line username and password
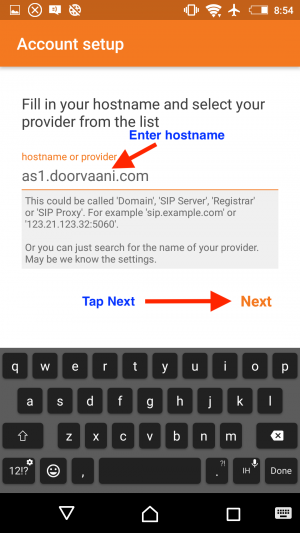
- Enter hostname: as1.doorvaani.com. Ensure that you entered correct spelling of hostname.
Enter SIP Hostname
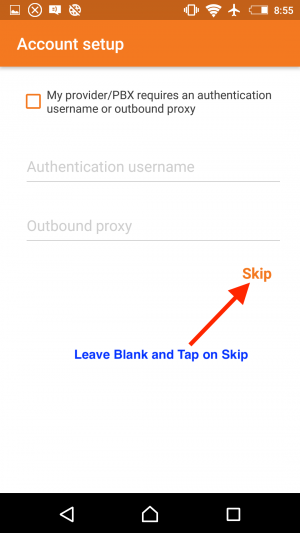
- “Authentication username” and “outbound proxy” are optional and are not required in our system. Please leave these inputs blank and tap on skip.
Skip Auth Name outbound proxy
- On the “choose configurations” screen, if none of the configurations are found, then select SIP UDP and tap on Finish. Refer to the next item if one or more of the configurations are found. Please note that “Not found” is not an issue.
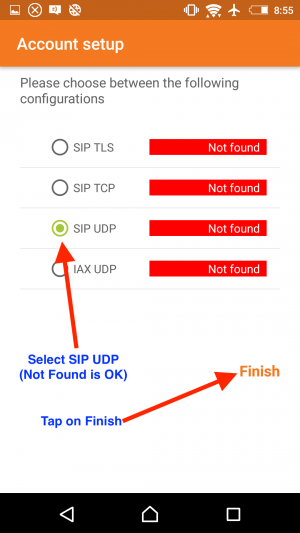
Configuration SIP UDP Selected
- If you see SIP TCP found, then you can select it and tap on the finish button.

Configuration SIP TCP Selected
- Tap on Allow for ZoiPer to make and manage phone calls.
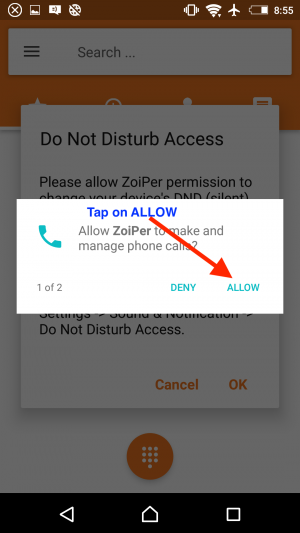
Allow to Manage Phone Calls
- You can Deny access to photos, media and files on your device.
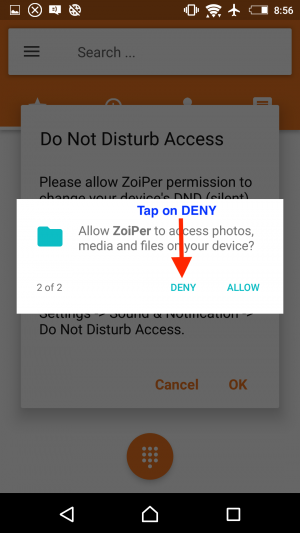
Deny Access to Photos Media Files
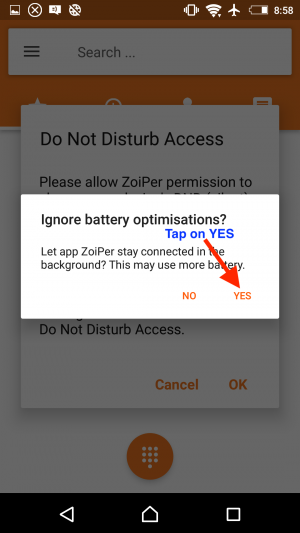
- Tap on “Yes” to “Ignore battery optimisations?” question unless you want to subscribe for “ZoiPer Push Proxy” as an InApp monthly subscription purchase directly in the Google Play Store. Selecting “YES” is required to get inbound calls. If you do not want to get any inbound calls then you can select the “No” option. Please refer to item 21 below for more details on the “Push Proxy” subscription.
Yes to Ignore Battery Optimisations
- Cancel the “Do Not Disturb Access” popup message.
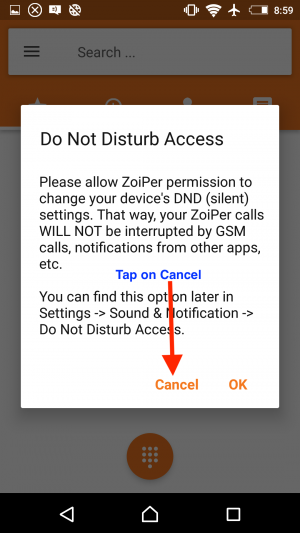
Cancel Do Not Disturb Access
- Tap on the 3 bars menu to see ZoiPer main menu.

3 bars menu and Dial Pad Icon
- You should see “Account is ready” message in main menu screen. If you do not see this, you should go back to check your username, password, hostname and Internet connectivity etc., If you have access to any other WiFi then switch it over or switch it between Data Connection like 3G/4G and WiFi and see how it goes. If you need to, you should reset your VOIP Line password (refer to item 5 above to see how to reset your VOIP Line password). Any issues will be immediately auto e-mailed to you by our servers so you should watch your E-mail inbox for DoorVaani messages.
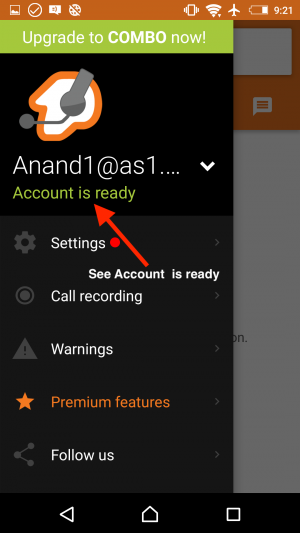
Account is ready in 3 bars menu
- From the 3 bars main menu you have access to other menus like “Accounts” and “Connectivity” etc.,
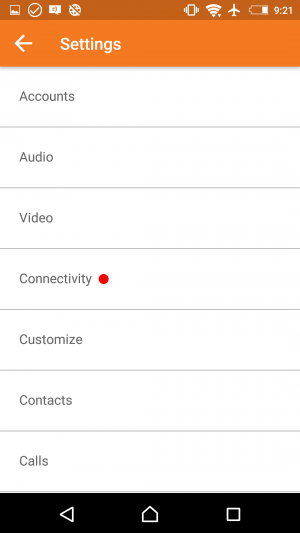
Settings Menu
- From the Settings menu, tap on Accounts to see your account. Here you should see your “Account is ready”. If you don’t see your account as ready, please refer to item 15 above on the possible causes and fixes. Here the account name you see is the default name chosen by ZoiPer.
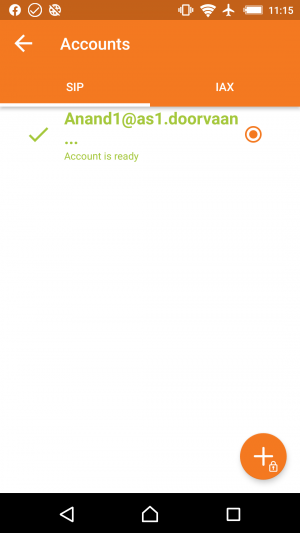
Account Ready with Default Name
- Tap on the 3 dots icon of your “Account Name” in Accounts screen to see full details of your account. You can see hostname and your “VOIP Line username” as entered by you here. You can also change these values along with changing the “VOIP Line password” from this screen.
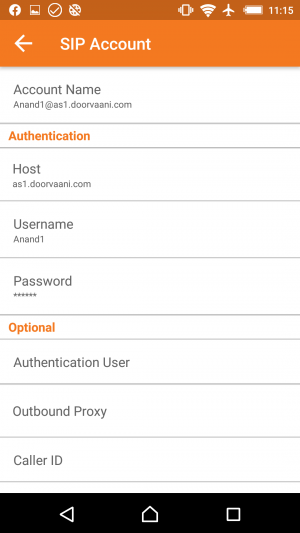
Account Details
- Tap on “Account Name” to change the default account name created by ZoiPer to a name you like or easier for you to recognise your account. One of the suggested Account Name is simply “My DoorVaani Account”.
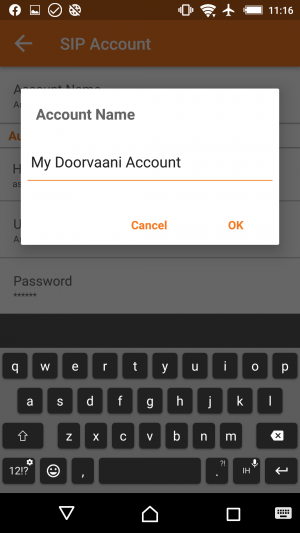
Account Name Edit
- You can now see your updated Account Name in Accounts screen.

Account Ready with Custom Name
- Tap on Connectivity menu from main menu to see your connectivity options. Please ensure that “Keep Alive WiFi” is checked ON and “Run In Background” is checked ON. Both of these options are checked ON by default. If you want, you can subscribe to and/or enable “PUSH proxy” from this screen.

Connectivity Options
- Tap on the Dial Pad icon (refer to item 14 above) to open the dialpad to dial outbound calls. You should be dialling the full number starting from country code and then tap on the call button to place the call.

Dialing and Calling Numbers
Please ensure that you continuously run ZoiPer in the background to get inbound calls. You won’t get inbound calls if your ZoiPer is not running on your device.